Well, here we are – the final recipe of Reader Month. What a dark incredible journey it’s been! I got intimate with Candle Salad, learned the ins and outs of Ice Cream Bread and even lost five pounds in an hour, courtesy of Mushroom Fluff.
I saved the most challenging recipe for last. This one was sent to me by Jennifer from the February 1954 edition of McCall's magazine. I know cutting a donut in half and inserting a piece of cheese may seem complicated, but just follow the instructions carefully and give yourself plenty of time. You can do this!
Actually, I posted this to prove a point. Everyone’s going on about weird food combinations these days, like chocolate-dipped bacon or marshmallow-crusted chicken or salads with shards of glass. But this recipe proves people have been doing stupid things with food for a very long time. It reminds me of that old saying: What goes around will come around again even though people think it's the first time they've seen it. That makes sense, right?
Thanks to everyone who submitted a recipe. If I didn’t get to yours, it doesn’t mean I won’t feature it in the coming months so keep your eyes peeled. If you’ve got a recipe you want to share, email cakercooking at gmail dot com.
Directions: Take a donut. Cut it in half. Put a piece of cheese in it. Eat it.

Source: Caker Jennifer via McCall’s
(Click the image to see a larger version of the ad. It's worth it.)

We continue riding the carousel of gaiety that is Reader Recipe month with MushTun Toast, courtesy of Marie-Claude.
Before going any further, you may want to grab some clip-on sunglasses to shield your eyes from this kaleidoscope of colours. Just look at nature’s majesty! Why, there's brown. And, well, some light grey. And, uh, dark grey.
MushTun Toast reminds me of Chicken à la King which many caker kids ate for lunch on Saturdays. It came in a can and was also served on toast. Then there was Mock Chicken à la King for poor caker kids who couldn’t afford chicken. Or mushrooms. Or even toast. Sadly, those kids had to eat a paper towel smeared with Crisco while wearing potato sacks and humming the theme song from The Little Rascals. Isn't poverty the worst?
Marie-Claude was considerate enough to point out that MushTun Toast should be eaten with a knife and fork. I usually stick to the ol’ spatula and cheese grater when I dine, but maybe I’m more of a renaissance kind o' guy.
Thanks, Marie-Claude! Y'all come back on Monday for the final reader recipe of the month.
1 can of Campbell's Cream of Mushroom soup
1 can of tuna
Bread for toast
Mix cream of mushroom and tuna in a pot and heat until it boils. Stir often. Make some toast and add the mixture on it. Use fork and knife to eat.
Source: Caker Marie-Claude

When reader Bernice sent me some recipes from her mother’s New Zealand church cookbook, I was pretty pumped. I mean, these recipes came from cakers who lived across the world. Considering the farthest I’ve been is across the street, you can imagine how National Geographic-ish I felt as I set out to make Mushroom Fluff.
Ever get the sense that something’s not right when you take it out of the oven? I suppose that applies to most caker food. But in this case, things seemed more "off" than usual. Mushroom Fluff came out looking more like mushroom soup. But, being the trooper I am, I dug in.
A half hour later, the fluff started flopping. Like, real bad. I haven’t moved that fast since Sears had a sale on Wrangler jeans. Naturally, I was mortified when the police showed up at my door. The neighbours had called to report sounds of a “violent commotion.” I couldn’t apologize enough to the police officers and offered to make a caker candy tree for their next fundraiser.
Was it the eggs? The milk? Was it not cooked enough? Who knows? Bernice, I wish I could say my first experience with New Zealand caker food was a good one. But the next time fluff comes a’knockin’, I ain’t a’answerin'.
1 tin mushroom soup
4 ounces grated cheese
½ teacup of milk (see note)
2 eggs
Stir together the soup, the cheese, the milk and the egg yolks. Beat egg whites stiffly and fold gently into mixture. Place in greased dish and bake in hot oven (400 degrees) for 30 minutes.
Note: I assumed this was a ½ cup, but maybe the measurements are different in New Zealand. That might’ve explained the soupiness.

Source: Hataitai Methodist Church, 1964

For many cakers, there's no better way to top off a big serving of Candle Salad than with some chocolate (and possibly a cigarette). So I thought this would be the perfect time to post a recipe I received from a reader named Polly.
Polly emailed me to say that she’d put together a book of her favourite recipes for her kids. I think that’s a great idea. I wish my mom had done the same. Instead, she handed me a can opener one day and said, “Best of luck, kiddo.”
I picked Polly’s chocolate chipper cake to make for obvious reasons. However, I took some issue with the fact that it calls for cooked pudding, not instant. “Cooked?!?” I said to myself, running to the calendar to check what century we're living in. Was Polly expecting me to wear a crinoline while making it, too?
Yes, cooking the pudding stole a good portion of my life that I’ll never get back. However, all that sweat and arm motion (I believe it’s called “stirring”) was worth it. Chocolate chipper cake was probably one of the best cakes I’ve ever tasted. And believe me, I've eaten a lot of cake in my day, m'kay?
Polly, your kids are lucky to have these recipes. Now I’m lucky, too. Thanks for sharing.
Have YOU got a caker recipe you’re itching to share? Email me at cakercooking at gmail dot com.
1 large package chocolate pudding mix - The kind you cook, NOT INSTANT (See note 1)
3 cups milk
1 box chocolate cake mix
1 12 oz pkg chocolate chips
Directions:
Preheat oven to 350 degrees. Grease and flour a 9 X 13 pan. Prepare pudding mix according to package instructions. (See note 2) It is faster and easier to follow the microwave directions to cook the pudding. (See note 3) Stir cake mix into pudding until well blended. Pour into pan and sprinkle with chocolate chips. Bake for 30 minutes. Best if served warm.
Note 1: POLLY'S CAPS, NOT MINE
Note 2: Give yourself lots of time for this step. You may miss your child’s graduation. That’s all I’m saying.
Note 3: I CAN'T AFFORD A MICROWAVE
Source: Caker Polly

The wholesome fun of reader recipe month continues!
There are lots of things I don’t understand about vintage caker cooking. For example, why would you solidify a garden salad or add tomatoes to JELL-O? But of all the caker mysteries, candle salad never fails to, er, rise above the pack.
I have a hard time believing anyone could serve this with a straight face. I mean, it has dribbles of mayonnaise, for crying out loud. I know housewives from the '50s seemed pretty naïve, but Lucy had a kid, after all. She must’ve seen Ricky’s babalu at some point. Didn’t she see what we’re seeing? (I have a feeling Ethel knew, but Ethel had a past. You could just tell.)
This recipe was sent to me by readers Zöe and Jenny. Jenny runs the blog Silver Screen Suppers. She sent the recipe because it calls for a Life Saver – something that Jenny tells me they don’t have in England. I think that’s terrible. I mean, what joy can be found at Christmas without a Life Saver book wedged into your stocking?
Look very closely at Anne Shirley's eyes. Does she know or not? She knows, right? Tell me Anne knows.
Thanks Jenny and Zöe! Do YOU have a caker recipe you'd like to share? Email me at cakercooking at gmail dot com and I'll do my best to feature it.
1 can sliced pineapple
2 bananas
1 package of life-savers
1 bottle of maraschino cherries
Take a leaf of lettuce to decorate the plate and place on top of that 1 slice of pineapple. Cut the banana in half and place 1/2 in the hole the pineapple. Place the cherry on top of the banana half (see note). Then take 1 life-saver and put it about 1/2-inch above the pineapple into the banana. Then cover the top with mayonnaise. Then you have completed the candle stick. The pineapple is the holder, the banana the candle, and the cherry the flame, and the mayonnaise the drippings, and the life-saver is the handle.
Note: My candle had a, uh, slight curve to it. So I had to affix the cherry with a tooth pick.
Source: Anne Shirley via Jenny
Here's more on Anne, if you're interested

When I kicked off Reader Recipe month earlier this week, I couldn’t have imagined the kerfuffle ice cream bread would cause. As you’ll see in the comments section, everyone had an opinion about what to do – or not do – to make this two-ingredient bread better.
When Stephanie commented that she’d made a version with a cake mix and not flour, I did what any self-respecting caker would do – put on my slacks, ran out to No Frills and whipped me up a brand new loaf. (America’s Test Kitchen's got nothing on me.)
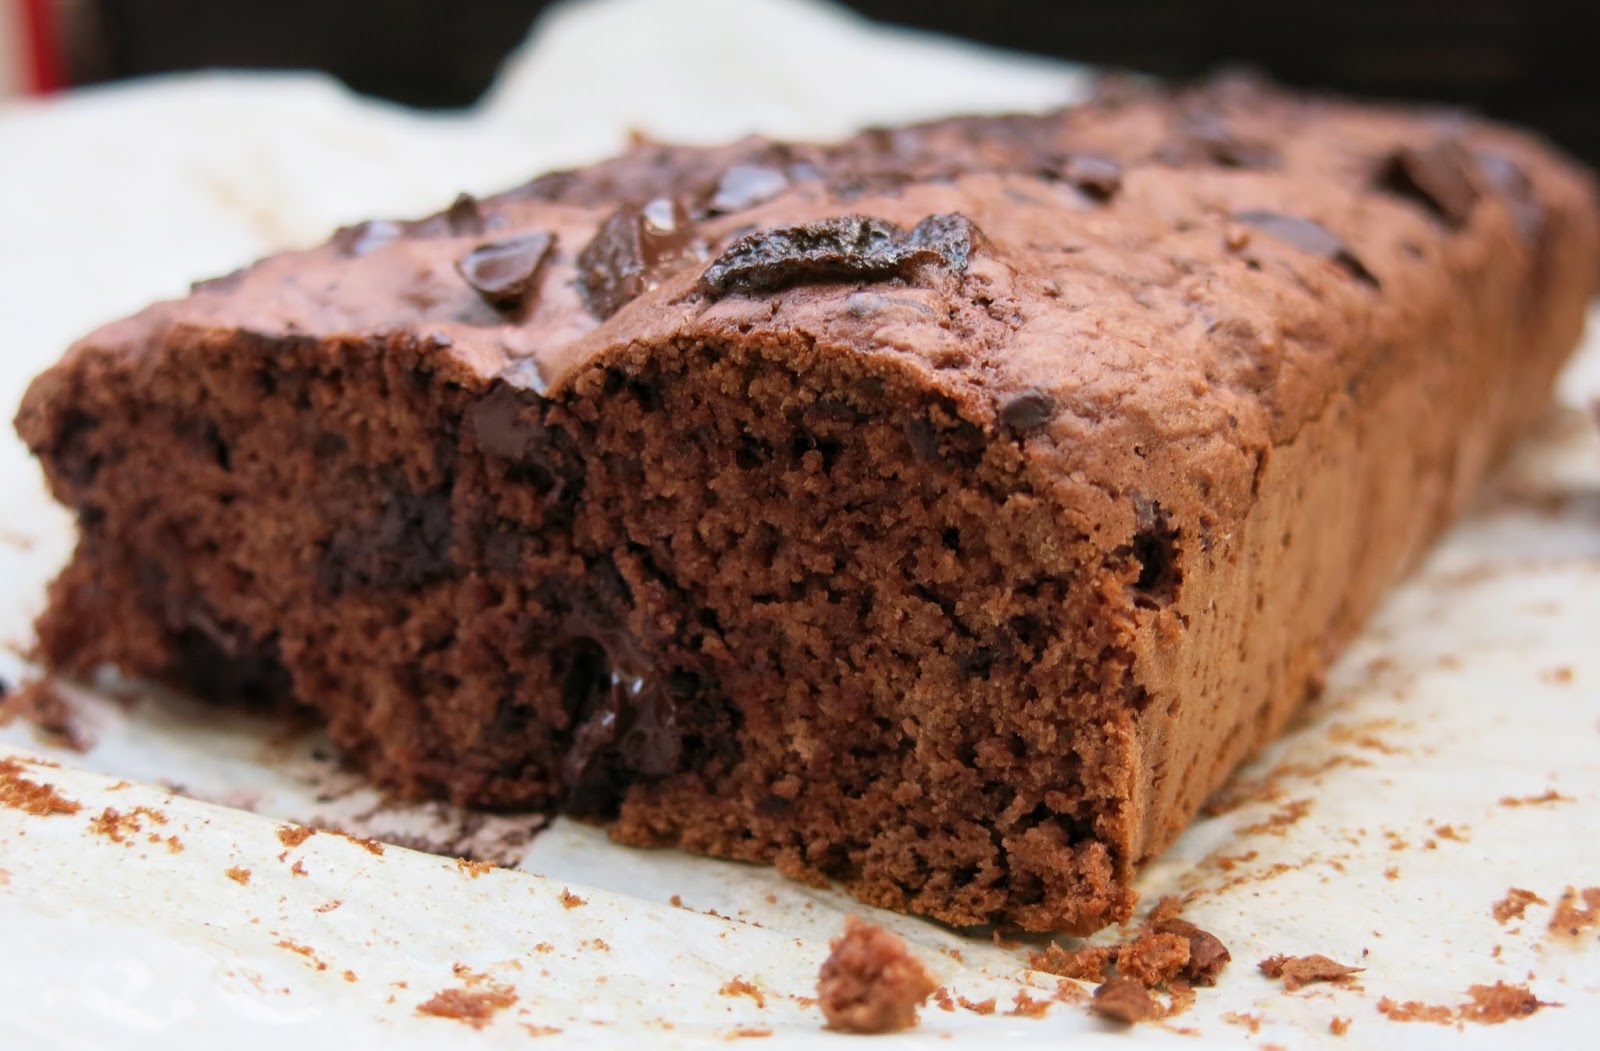
I opted for a chocolate fudge cake mix and Rolo ice cream. Following Stephanie’s instructions, I melted two cups of the ice cream, stirred it into the mix, poured it into a loaf pan and baked it for about 55 minutes at 350.
The result? Ice cream bread, thou art redeemed!
This version was dense, chocolately and chewy. Just like a big brownie. Only with bits of Rolo. Having said that, using cake mix instead of flour means the recipe’s not as exciting. You’ll lose points at the next cribbage night in terms of shock value, but you’ll make up for those points in taste.
Stephanie, thanks for the tip! Reader Recipe Month continues on Monday with something that’s a little, er, hard, to describe.
Do YOU have a caker recipe to share? Email it to me at cakercooking at gmail dot com. I'll do my best to feature it in an upcoming post!
 Serve with a side of – what else? – Rolo ice cream.
Source: Caker Stephanie

September is Reader Month! For the rest of the month, I'm featuring a reader recipe every Monday and Friday. Who’s jealous of my life? [insert cricket FX]
I’m starting things off with the strangest recipe I’ve seen in a while – and that’s saying a lot. I was first sent the recipe for ice cream bread by fellow blogger, Jenny. Then my sister Sue sent me a recipe book that her work colleagues put together. Lo and behold, there was ice cream bread again. I figured it was one of those signs. Like locusts.
Alls you do is mix ice cream with self-rising flour. I used peanut butter chocolate ice cream and threw in some old chocolate chips I had lying around. Then I brought it into work for a taste test. Comments ranged from “good” to “so-so” to “it tastes like an old cupboard.” (That could’ve been the chocolate chips.)
Anyways, what ice cream bread tastes like is besides the point. In the world of caker cookery, it’s the thrill of revealing what our food is made with that really counts. And once you unveil your magic ingredient, you’ll have every caker going back for seconds, old cupboard taste or not.
See you on Friday!
2 cups of your favourite ice cream, softened
1 and 1/2 cups of self-rising flour (see note)
Preheat your oven to 350 degrees. Grease and flour an 8×4 inch loaf pan. Mix the ice cream and flour together in a bowl just until combined. Smooth it out so it looks even. Bake for 45 minutes or until toothpick inserted comes out clean. Cool for a while and then serve. If you don’t have self-rising flour, simply use regular flour! For every cup of flour add 1 1/2 tsp baking powder and 1/2 tsp salt (sift together).
Note: I got into an argument with the woman at the bulk store because I said cake flour was the same thing as self-rising flour. She said it wasn’t. Turns out she was right, so I can never go back to that store again. Anyhoo, I used the flour/baking powder/salt option, but my loaf seemed kind of flat. Maybe my pan was too big.
Source: Sue's work cookbook
Well, after the brouhaha of Knoxapocalypse, I thought it was only fitting to turn my attention back to you, my Caker Cooking readers. For the rest of the month, I'll feature not one but two reader recipes every week! (God help my arteries.)
Warning: some of these recipes are pretty risqué. I might have to put a parental advisory on this blog by the time I'm done.
See you Monday with our first reader recipe!
Brian

This week, I’m participating in something called “Knoxapocalypse” with other food bloggers from far-away places like England and the United States. We all swapped recipes that called for gelatin. I got something called Maple Fluff, courtesy of Bitter Sweet Susie.
Folks, Maple Fluff whipped me into a frenzy. It took an hour to make, which is 58 minutes longer than most caker recipes. Then there were all these phrases I’d never heard before, like “stir constantly” and “egg whites.” Honestly, I was going bananas.
So was the end result worth it?
Well, it looked like chunky, taupe vomit going into the fridge. (I may have folded in the egg whites too soon, but I was getting impatient, what with Mother hollering that it was time for Mystery Detectives on the Nancy Grace channel.) But I have to say – Maple Fluff tasted fan-fluffing-tastic. Kind of like a maple custard tart. Only better. Because it was a big maple custard tart.
Would I eat it again? You bet. Would I make it again? Hell, no.
2 tablespoons unflavoured gelatin
¼ cup cold water
1 pint cream
2 eggs, separated
1 cup maple sirup (see note 1)
½ cup shredded coconut
¼ teaspoon salt
½ teaspoon almond extract.
Soften gelatin in cold water. Heat cream over hot water, then pour slowly over slightly beaten egg yolks. Return mixture to double boiler and cook 5 minutes, or until it starts to thicken, stirring constantly. Remove from heat and stir in softened gelatin. Add maple sirup and cool. When mixture begins to thicken, add coconut, salt and almond flavoring. Beat egg whites until stiff but not dry and fold into mixture (see note 2). Pour into individual molds and chill until firm (see note 3). Serve plain or top with sweetened whipped cream, sprinkled with toasted coconut. Serves 8.
Note 1: Yes, I know how to spell syrup. But that’s how the book spelt it.
Note 2: I didn’t get salmonella, but I was worried.
Note 3: Do you have 8 individual molds sitting in your cupboard, just waiting to be used? I sure don’t. (I don't even have 8 friends.) So I poured everything into one big mold.
So what did my fellow food bloggers get up to? Check out their Knoxapocalypse creations, but BE WARNED. Some of this stuff ain't pretty:
Betty Davis' Mustard Ring made by Retro Recipes
Melon Mousse made by Bitter Sweet Susie
Olive Wreath Mold made by Dinner is Served
Molded Avocado and Tuna made by The Retro WW Experiment
Turkey in Aspic by Silver Screen Suppers
Pickle and Pineapple Salad by Mid-Century Menu

Source: 250 Delectable Desserts