Showing posts with label Bread and Loaves. Show all posts

Monday, 21 July 2014

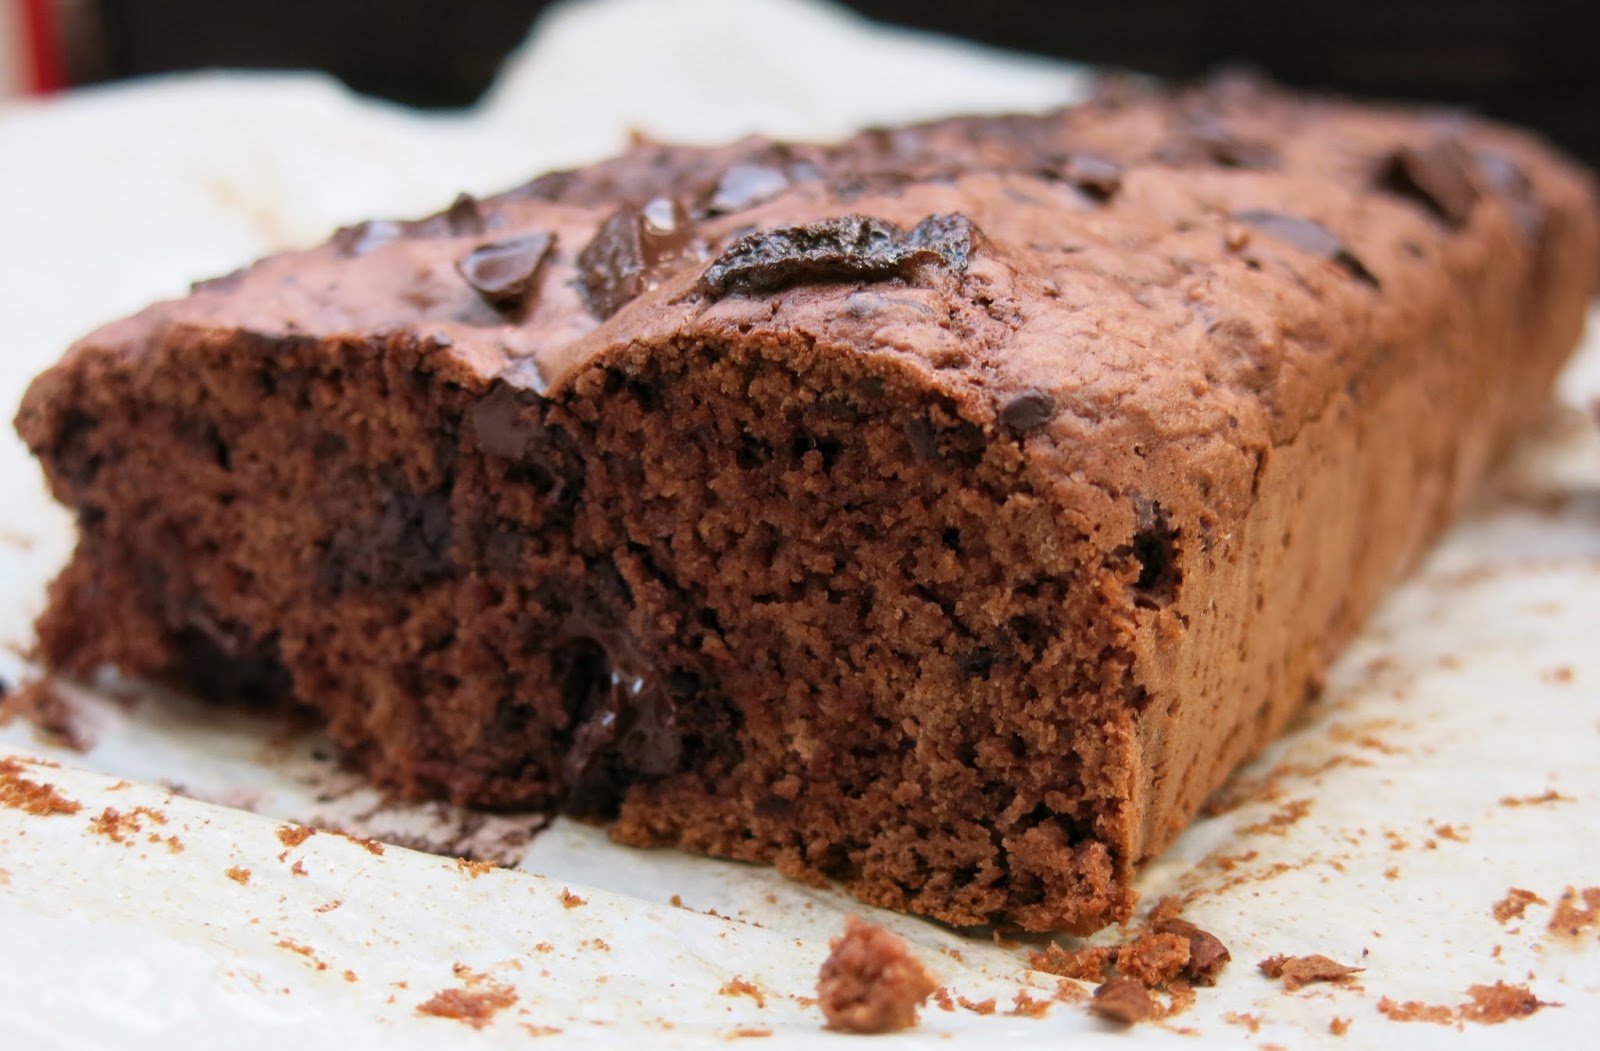
Pork n' Beans Bread


I don’t know what kind of pills they’re taking, but today’s senior cakers are nothing like the generation before them. Long gone are the needlepoint, ugly shoes and blue rinse. These days, elderly folks are hang gliding, purchasing prophylactics and wearing hot pants. (Trust me on the hot pants. There’s an old man in my hood who wears them and brother’s got gams.)

Awhile back, my mom took me to the mall food court where her posse hangs out. There was a square dance going on – and you should’ve seen these seniors cutting a rug! I even noticed a pair getting frisky in the corner. My mom said they were just sharing a piece of Freedent, but I have my doubts.

This week’s recipe was given to me by my mom’s friend Mia, who, at 96, is still going strong. (The preservatives in caker food mean we’re always the last ones standing.) Mia says Pork n’ Beans Bread is a family favourite and while I admit that the idea of eating pureed pork was troublesome, I’m happy to report that it’s moist (thanks, cup of oil!) and delicious. Like a soft spice cake. Only better. Because it’s got fibre. And, uh, pork.

Speaking of fibre, there ain’t none in Italy. Which explains my pinched expression during my recent visit there. Come back Friday for my “Caker in Itlee” investigative report. Let’s just say the Ragu’s about to hit the fan.

Thanks, Mia! See you on the dance floor.

15-ounce can pork and beans
4 eggs, beaten
1 cup vegetable oil
1 teaspoon vanilla extract
2 cups sugar
1 teaspoon baking soda
½ teaspoon baking powder
½ teaspoon salt
1 ½ teaspoons cinnamon
1 cup chopped pecans or walnuts
3 cups flour

Spray two 9”x 5”x 3” loaf pans with Pam. Don’t drain pork and beans. Put in a food processor or blender and process them until they’re pureed smooth with no lumps. Place beaten eggs in large bowl. Stir in pureed pork and beans and mix well. Add vegetable oil and vanilla. Mix well. Add sugar, then mix in baking soda, baking powder, salt and cinnamon. Stir. Stir in chopped nuts. Add flour, 1 cup at a time, stirring after each addition. Spoon half of batter in one loaf pan and other half in second loaf pan. Bake at 350° for about 1 hour.


Source: Caker Mia

Monday, 16 June 2014

Cherry Loaf


Sometimes, I imagine caker ingredients competing in a beauty pageant. Why, here comes Miss Dream Whip (note the pale complexion). Next up, it’s Miss Tomato Soup (she’s a tangy one, fellas). And let’s not forget Miss Shredded Coconut (a little scattered). But no contestant comes close to the Red Number 4 glory of Miss Maraschino Cherry.

Plump, bright and shellacked in high fructose corn syrup, Miss Maraschino Cherry has style, sophistication and definitely leaves her mark. (Seriously, don’t get maraschino cherry juice on your counter.) From scaling the heights of an ice cream sundae to diving into the depths of an icy Coke, Miss Maraschino Cherry makes Alexis Carrington look like Mama June.

This Cherry Loaf took me back to my Betty Crocker Easy-Bake Oven days (not that I was allowed to have one – I had to steal borrow it from a female friend) because one of the mixes was cherry and the cake had the same pink colour as this loaf. Come to think of it, I blame Betty Crocker for turning me into a caker in the first place. I mean, baking with a light bulb? That’s more caker than a microwave.

1 c. w. sugar
1 egg
1/8 tsp. salt
½ c. butter
Small bottle cherries
Pour juice into a cup and fill with milk (see note 1)
2 c. flour
2 tsp. B. powder
1/2 c. walnuts and raisins may be added.
When you add the cherries, use electric mixer and they will cut into small pieces. Bake in loaf pan 1 hr. (see note 2)

Note 1: I assumed “a cup” meant a 1-cup measuring cup. Also, I couldn't find a small bottle, so estimated half of a large bottle.
Note 2: Caker ladies aren’t always the most thorough with their instructions. I baked mine at 350.


Source: Wheatland Cooks Celebrate

Monday, 10 February 2014

Reader Recipe: Catherwood Muffins


We’re into the second week of Reader Recipe Month!

Today’s caker recipe comes from Kate, who got this "muffin" recipe from her math teacher, Miss Catherwood. It’s since become a family favourite. Kate’s sister even used the recipe for her wedding cake! (Beats the heck out of fruitcake, IMHO.)

Now that I think about it, I learned a lot from my teachers growing up. Important things, like sleeves are a great place to store Kleenexes. And music teachers can get very emotional in the days leading up to a Christmas concert. And smoking is okay, so long as you do it in the staffroom.

Another thing I learned: just because you call something a “muffin” don’t make it no muffin. Catherwood Muffins are cupcakes, folks. These have as much nutritional value as a mango-scented Yankee candle. However, they’re dangerously delicious. (I think the pudding and sour cream have something to do with that.) I have no other choice but to dismiss class and order you make them immediately. Consider it your Home Ec homework.

Thanks, Kate! Check out Kate's book blog.

Come back Friday for the next reader recipe. I finally win at JELL-O!

1 package (18oz) devil's food cake mix
1 package (3 3/4 oz) instant chocolate pudding mix
1 cup sour cream
1/2 cup vegetable oil
1/2 cup warm water
4 eggs, lightly beaten
1 1/2 cups chocolate chips

Pre-heat the oven to 350 degrees. Place the first 6 ingredients in a bowl and beat for 4 minutes. Fold in chocolate chips. Line a muffin tin with large baking papers and fill with batter. Bake in 350 degree oven for 20 minutes. (See note.) Try to wait until they are cool enough to handle safely before enjoying the gooey, chocolatey goodness!

Note: I left mine in for 25 minutes.

Source: Caker Kate via Caker Miss Catherwood

Friday, 7 February 2014

Reader Recipe: Liberace Sandwich


It’s time for our second reader recipe of the week!

When Caker Cooking reader Catherine sent me the recipe for Liberace Sandwich, I got pretty excited. There’s nothing more glamorous than eating the same thing as a Hollywood star. (Case in point: Barbara Mandrell’s Pig Out Cake.) And when that star has the mega-wattage of Liberace, well, sit back and put on the rhinestone-crusted sunglasses, my friends.

This sandwich proves two things: 1) Liberace was a caker (which, c’mon, we all knew – anyone with hair that stiff is down with the tater tots) and 2) his talent went beyond piano playing. The man knew his way around a loaf of white bread like nobody’s business. This egg-soaked, cheese-filled, bacon-topped creation really tickled my ivories.

Catherine also sent me a recipe for something called Fluffy Muff. I’m going out on a limb here, but I doubt Liberace ever made that for dinner.

Thanks, Catherine!

Make 6 sandwiches, no butter, cut off crusts, with cheddar cheese. Place in shallow, buttered pan. Beat 4 eggs with 2 cups milk, 1/2 tsp minced onion, 1/2 tsp dry mustard. Pour over sandwiches. Let stand 10 minutes. Bake in 375 oven 30 minutes or until lightly browned. Remove and top with sliced, peeled ripe tomatoes. Cover with strips of pre-cooked bacon. Place under broiler for 2-3 minutes.

Source: Caker Catherine via Ladies Aid, Ogunquit Baptist Church, Ogunquit, Maine, 1975

Friday, 13 September 2013

Ice Cream Bread: Version 2.0


When I kicked off Reader Recipe month earlier this week, I couldn’t have imagined the kerfuffle ice cream bread would cause. As you’ll see in the comments section, everyone had an opinion about what to do – or not do – to make this two-ingredient bread better.

When Stephanie commented that she’d made a version with a cake mix and not flour, I did what any self-respecting caker would do – put on my slacks, ran out to No Frills and whipped me up a brand new loaf. (America’s Test Kitchen's got nothing on me.)

I opted for a chocolate fudge cake mix and Rolo ice cream. Following Stephanie’s instructions, I melted two cups of the ice cream, stirred it into the mix, poured it into a loaf pan and baked it for about 55 minutes at 350.

The result? Ice cream bread, thou art redeemed!

This version was dense, chocolately and chewy. Just like a big brownie. Only with bits of Rolo. Having said that, using cake mix instead of flour means the recipe’s not as exciting. You’ll lose points at the next cribbage night in terms of shock value, but you’ll make up for those points in taste.

Stephanie, thanks for the tip! Reader Recipe Month continues on Monday with something that’s a little, er, hard, to describe.

Do YOU have a caker recipe to share? Email it to me at cakercooking at gmail dot com. I'll do my best to feature it in an upcoming post!

Serve with a side of – what else? – Rolo ice cream.


Source: Caker Stephanie

Monday, 9 September 2013

Reader Recipe: Ice Cream Bread


September is Reader Month! For the rest of the month, I'm featuring a reader recipe every Monday and Friday. Who’s jealous of my life? [insert cricket FX]

I’m starting things off with the strangest recipe I’ve seen in a while – and that’s saying a lot. I was first sent the recipe for ice cream bread by fellow blogger, Jenny. Then my sister Sue sent me a recipe book that her work colleagues put together. Lo and behold, there was ice cream bread again. I figured it was one of those signs. Like locusts.

Alls you do is mix ice cream with self-rising flour. I used peanut butter chocolate ice cream and threw in some old chocolate chips I had lying around. Then I brought it into work for a taste test. Comments ranged from “good” to “so-so” to “it tastes like an old cupboard.” (That could’ve been the chocolate chips.)

Anyways, what ice cream bread tastes like is besides the point. In the world of caker cookery, it’s the thrill of revealing what our food is made with that really counts. And once you unveil your magic ingredient, you’ll have every caker going back for seconds, old cupboard taste or not.

See you on Friday!

2 cups of your favourite ice cream, softened
1 and 1/2 cups of self-rising flour (see note)

Preheat your oven to 350 degrees. Grease and flour an 8×4 inch loaf pan. Mix the ice cream and flour together in a bowl just until combined. Smooth it out so it looks even. Bake for 45 minutes or until toothpick inserted comes out clean. Cool for a while and then serve. If you don’t have self-rising flour, simply use regular flour! For every cup of flour add 1 1/2 tsp baking powder and 1/2 tsp salt (sift together).

Note: I got into an argument with the woman at the bulk store because I said cake flour was the same thing as self-rising flour. She said it wasn’t. Turns out she was right, so I can never go back to that store again. Anyhoo, I used the flour/baking powder/salt option, but my loaf seemed kind of flat. Maybe my pan was too big.

Source: Sue's work cookbook

Friday, 9 August 2013

Crakers


A couple of weeks ago, a work colleague brought in something called a “cronut,” a cross between a donut and a croissant. Apparently they’re all the rage in NYC and people line up all day to get one. It was tasty, but not worth four hours of staring at the back of a stranger’s head.

Then, the other day, someone gave me a “crookie.” It’s a croissant stuffed with Oreo cookies. They’re selling them at a fancy bakeshop here in Toronto. Apparently, everyone’s going nutso for these, too.

“Goldarn it,” I thought. “Why am I sitting here, letting all these non-cakers get rich?”

So I bought some Pillsbury Crescent Roll dough and some (no-name) Oreos, threw them together and called it a “craker.” Tomorrow morning, I’m setting up my card table on the front lawn and selling them with a cup of Taster’s Choice for only two bucks! Mother is polishing her toonie as I write this.

While I should guard this recipe, I’ll share it with you. Just don’t set up shop across the street or I’ll be real mad.

Take a can of Pillsbury Crescent Rolls and unroll them. Crush up some Oreos, eat half of them, then put some cookies at the large end of dough and roll them up. Bake according to package directions. When you take them out of the oven, cut a small slit at the top and insert an Oreo piece. Then get rich.


Mmm. Don't they look all good-like inside?


Why not store them in a caker baker cereal box container?


Source: Me 

Monday, 6 May 2013

Bun Spread


It’s Caker Cooking’s two-year anniversary!

It seems like only 730 days ago I posted my first recipe for Mock Apple Pie. Since then, there have been a few tears, a few laughs and more than a few pounds. (It’s gotten so bad, I’m wearing Spanx in the shower these days.)

To celebrate my milestone, I’m christening May as Unfortunately Named Caker Recipe Month. Every week I’ll feature a caker recipe that – while delicious – has a name only a mother could love. Provided that mother is blind, deaf and delusional. I’ve posted some unfortunately named recipes before (remember Dump Cake and White Stuff?) but the recipes I’m featuring this month have a special place in my heart.

On that note, I can’t think of a better way to celebrate my anniversary than by spreading my buns.

Er. That didn’t sound good. Let me try again. 

Who doesn’t love a tasty bun spread?

Uh, take three.

When was the last time a bun spread made your eyes roll back in your head?

See what I mean? Regardless of how you say it, stringing the words “bun” and “spread” so close together is pretty much guaranteed to garner some awkward coughs, gossip at the next Euchre night or, if you're lucky, a phone number. My advice? Leave out the “bun” and just say “spread.” As in, “Hot damn, Dolores – now that's what I call a spread!”

Now doesn’t that sound better?

See you next week for another unfortunately named caker recipe!

1 can tomato paste
1 can shrimp
½ cup cooked bacon or ham
½ teaspoon Italian spice
1 can mushrooms
½ cup grated cheese
¼ cup brown sugar
¼ cup green pepper
¼ cup onion
Mix all ingredients together. Spread on bun halves. Bake at 350° for 20 minutes This mixture can be frozen.

Editor's note: Fresh buns make all the difference in the world.


Source: Cook Book of the Mount Royal United Church, Saskatoon

Monday, 25 March 2013

Easter Special: Resurrection Rolls


When I was a caker kid growing up in the United Church, there was nothing I liked better than Holy Communion. It meant you got a free cube of Wonder Bread and a thimble-full of grape juice. Heck, that was more than we had most days for lunch, especially if Mother lost at Bingo that morning.

Resurrection Rolls represent the miraculous story of Jesus rising from the dead using – what else? – marshmallows and Pilsbury crescent roll dough. Look, I’m not saying it’s holiest of representations, but it sure is the tastiest!

In this recipe, Jesus is a marshmallow. You dunk him in melted margarine and sprinkle him with cinnamon sugar. Then you wrap him up in Pilsbury dough, pop him into the oven and when you open the “tomb” – poof! – he’s gone! Just make sure the seams of your tomb are sealed tight. Otherwise, it’ll look like Jesus is seeping out. And that can be a confusing message for kids.

From my ruffled curtain kitchen to yours, all the best for Easter. May Peter Cottontail leave you plenty of eggs – just not the crappy kind with the white stuff in the middle.

1 or 2 cans of crescent dinner rolls
Marshmallows (large size)
Margarine (melted)
Cinnamon sugar

Separate the dough into triangles (representing the linen cloth used for burial – Luke 23:53). Dip marshmallows (representing the body) “in soil and spices” – Luke 23:56. Wrap the “body” in the “linen cloth” (lightly pinch seams) and lay on cookie sheet. Place in the “tomb” and bake according to directions on the can of the rolls. Remove from “tomb” to discover the body is gone! HE IS RISEN!!!

1) Dip the body.


2) Wrap it up.


3) Pray he doesn't leak.


UPDATE: I just clued in that the "tomb" is the oven and not the crescent roll, which is the linen. Sometimes, it takes me a while.

Source: Canadian Bible Society Celebration Cookbook

Monday, 11 March 2013

Battle of the Banana Breads: Caker vs. Hoity Toity

Caker on the left, hoity toity on the right.


I recently came across two recipes for chocolate marble banana bread. One was a caker recipe from Kraft and used Miracle Whip. The other was a hoity toity recipe with more words than the latest issue of Reader's Digest. I made both and hosted a blind taste test among some co-workers to see which loaf would reign supreme. 

I’m happy (but not surprised) to report that the caker version was the hands-down winner, getting ten votes compared to the hoity toity loaf’s two votes. People found the caker banana bread moister with more flavour. (Uh, it has Miracle Whip. Hel-lo!?) A few Grey Poupon types preferred the gourmet one, claiming the “crumb” was better. (I don’t even know what that means.)

Suffice to say, the folks at Kraft will be over the moon when they catch wind of this. The Thurston Howells of the world? Not so much.

A word of warning to my fellow cakers: Do NOT attempt the hoity toity recipe. It took 40 minutes to make (as opposed to 20 minutes for the caker version), I had to use more than one bowl and there are words I didn't understand, like “fine-mesh strainer” and “Dutch process” and “food processor.” By the time I finished, I had a real bad headache and lost a chunk of my life I'll never get back. Just do yourself a favour and stick to the caker version. 

Winner: Chocolate-Marbled Banana Bread (caker)
1 egg
½ cup Miracle Whip Original Spread
1 1/3 cups mashed fully ripe bananas (about 3)
1 ½ cups flour
1 cup sugar
1 teaspoon baking soda
1 teaspoon salt
4 squares Baker’s Semi-Sweet Chocolate, melted

Heat oven to 350˚. Beat egg, Miracle Whip and bananas in large bowl with whisk until blended. Mix all remaining ingredients except chocolate in medium bowl, Add to banana mixture; stir until just moistened. Pour half the batter into medium bowl; stir in chocolate. Spoon batters alternately into 8x4-inch loaf pan sprayed with cooking spray; swirl gently with knife. Bake 1 hour to 1 hour 5 min. or until toothpick inserted in centre comes out clean. Cool bread in pan 10 min.; remove from pan to wire rack. Cool completely.

Source: What's Cooking, Kraft

Thanks for passing it along, Morag!


Chocolate-Banana Marble Bread (hoity toity)
2 large or 3 medium very ripe bananas, at room temperature
¼ cup buttermilk, at room temperature
2 teaspoons pure vanilla extract
2 cups sifted cake flour
1 teaspoon baking soda
¾ teaspoon baking powder
¼ cup unsifted unsweetened Dutch-process cocoa powder
3 tablespoons boiling water, plus more if needed
1 ½ sticks unsalted butter, softened (65˚ to 68˚F)
1 cup sugar
2 large eggs at room temperature, lightly beaten

Preheat the oven to 350˚ and position an oven rack in the center. Lightly coat a (9x5) loaf pan with melted butter or high-heat canola-oil spray and line it with a piece of parchment paper that extends 1 inch beyond the long edge of both sides of the pan. Peel the bananas and place them in the bowl of a food processor. Process to a smooth puree. (Alternately, mash them in a bowl using a fork.) Measure out 1 cup of the puree and transfer to a medium bowl, discarding the rest of the puree or saving it for another use. Add the buttermilk and vanilla and whisk until just blended. Set aside.

Use a fine-mesh strainer to sift the cake flour, baking soda and baking powder together in a medium bowl. Whisk to blend well. Set aside. Place the cocoa powder in a small bowl. Pour the boiling water over the cocoa and stir until it forms a smooth paste—it should run thickly off the spoon. If it is too thick, add another tablespoon of boiling water and stir again. Set aside.

Place the butter and sugar in the bowl of a stand mixer. Beat on medium-high speed until the butter is very light, almost white in colour, 4 to 5 minutes. Scrape down the bowl with a spatula. Turn the mixer to medium speed and add the eggs, 1 tablespoon at a time, completely blending in each addition before adding the next. About halfway through the eggs, turn off the mixer and scrape down the bowl with the spatula, then continue adding the rest of the eggs. Scrape down the bowl again.

With the mixer running on the lowest speed, add one-third of the flour mixture. Just as it is barely blended and you can still see a few patches of flour, add half the banana mixture. Repeat with the remaining flour and banana mixtures ending with the flour. Scrape down the bowl and finish blending the batter by hand.

[Editor's note: You still with me or have you dozed off by this point?]

Transfer half of the batter to the second medium bowl. Add the cocoa paste and, using a rubber spatula, gently but thoroughly blend it into the batter.

Drop alternating spoonfuls of dark and light batters into the prepared pan, then marbleize by using a spoon to gently turn the batter over in 3 places down the length of the pan.

Bake the banana bread for 55 to 65 minutes, until firm to the touch and a toothpick inserted into the centre of the loaf comes out clean. Transfer to a rack to cool completely. When cool, remove from the pan, peel off the parchment paper, and cut slices by sawing gently with a serrated knife.

Source: The Art and Soul of Baking

Monday, 21 January 2013

Lynda's Pina Colada Muffins


Good lord, cakers love muffins. Our favourite is bran (in spite of the hayish aftertaste), but we’ve also been known to indulge in a banana or carrot muffin or sometimes a “morning glory” muffin. They’re like the kitchen sink of muffins. Once, I found an eraser in one which came in pretty handy.

When I saw this recipe for not just Pina Colada Muffins, but Lynda’s Pina Colada Muffins, well, I just knew these would be special. Any caker recipe with someone's name in the title implies legendary status. Especially since it wasn’t Lynda who submitted the recipe. It was Nettie.

So imagine my disappointment when Lynda’s Pina Colada Muffins turned out gummier than grandpa. “Maybe I was supposed to drain the can of pineapple,” I thought. The recipe didn’t say either way. So I made them a second time with a drained can. Better, but still gummy. My taste testers thought they weren’t bad. “But good enough to be named after someone?” I asked. The response was a half-hearted shrug.

Linda-with-a-y, I’d like nothing more than to report your muffins were the bomb, but a caker never lies. I can only wonder – did I do something incorrectly? Or did Nettie get the recipe wrong? Maybe the good people of Cobalt, Ontario just like really damp food. In any case, I’m heading out to make love at midnight in the dunes of the cape.

½ cup white sugar
1 ½ cup flour
1 egg
1 teaspoon baking powder
1 cup yogurt
1 teaspoon rum
1 10-ounce can crushed pineapple
½ cup coconut
¼ cup margarine
½ teaspoon salt

Measure sugar, egg, margarine, yogurt and rum. Beat until blended. Stir together dry ingredients and add to other mixture. Stir until barely blended. Add pineapple and coconut. NOTE: sour cream may be substituted for yogurt. Bake at 375° for 20 minutes. Yield 12 large.

Source: Cherished Recipes, Cobalt Public Library

(Thanks to Sarah for loaning it to me!)


Monday, 30 July 2012

Fibre-Rich Bean Muffins


Look, there’s no point beating around the bush – everyone suffers from constipation from time to time. But for cakers, getting bunged up is simply a fact of our everyday lives. It explains why so many of us walk around with that pinched look on our faces.

It’s no wonder traffic can get a little congested with all the processed, synthetic and non-green foods we cakers consume. But, thankfully, here’s a recipe guaranteed to get the lead out. So to speak.

Some of you may find making muffins with beans a little disturbing. But how is it any different than that Jessica Seinfeld book where she put things like spinach in brownies and bean sprouts in pudding? (Or whatever it was she did.)

As to how these muffins taste, I have to say not too bad. Kind of like mini Tomato Soup Cakes. In fact, I’ve already eaten thr–


Er…excuse me for a moment. Nature's calling.


1 cup raisins
1 cup boiling water
3 eggs
1 cup oil
2 cups white sugar
1 teaspoon vanilla
1 cup walnuts
1 14-ounce can beans in tomato sauce
½ teaspoon salt
3 cups flour
1 teaspoon soda
1 teaspoon cinnamon
½ teaspoon baking powder

Mix raisins with boiling water. Stir and set aside. Beat eggs, oil, sugar, vanilla and beans until beans are broken. Add flour and remaining ingredients, including raisins and water. Mix well. Spoon batter into large paper muffin cups. Bake at 325ยบ for 30 minutes.


Source: Centennial Central Cook Book

Monday, 21 May 2012

Overnight Cinnamon Buns


When it comes to brunch, most cakers make one thing: reservations. Brunch simply involves too much coordination too early in the morning. We have to toast the Eggos and then take out the Aunt Jemima syrup and then make Tang and, well, there are only so many hours in the day.

So imagine my angst over having ten people for brunch last Sunday. Ten Italians. One of whom was my mother-in-law. And it was Mother's Day.

It took some big caker balls to make these buns for the Italians. But sometimes in life, you just have to snip the dough, boil the ice cream and trust that the good women of the Canadian Bible Society will see you through, even if what you're putting into the fridge looks like chunky brown vomit. (See below.)

I had nothing to doubt, of course. These buns were sticky, gooey and made my house smell like a food court Cinnabon. Best of all? My mother-in-law had two servings.

Score one for the cakers.

2 packages of frozen bun dough (See note)
½ cup butter
¾ cup white sugar
¾ cup brown sugar
1 cup vanilla ice cream

Take slightly thawed bun dough and with kitchen scissors snip them into walnut sized pieces and place into a large sprayed cake pan. In saucepan, bring the butter, white sugar, brown sugar and ice cream to a boil. Remove from heat. Cool slightly. Pour mixture over dough and sprinkle with cinnamon. Cover and let sit in fridge overnight. In the morning, bake for a 20-30 minutes at 350°.

Note: I couldn’t find frozen bun dough, so ended up buying a five-pack of frozen loaf dough. I used about 2 ¾ loaves, but packed the pieces in too tightly, so the centre came out uncooked. If you go with bread loaf dough, 2 loaves should do it.


Source: Celebration Cookbook, Canadian Bible Society